Follow the guide below to set up IMAP email (Mail app) on an iOS device. (iOS 13+)
1) Open Settings in your iPhone
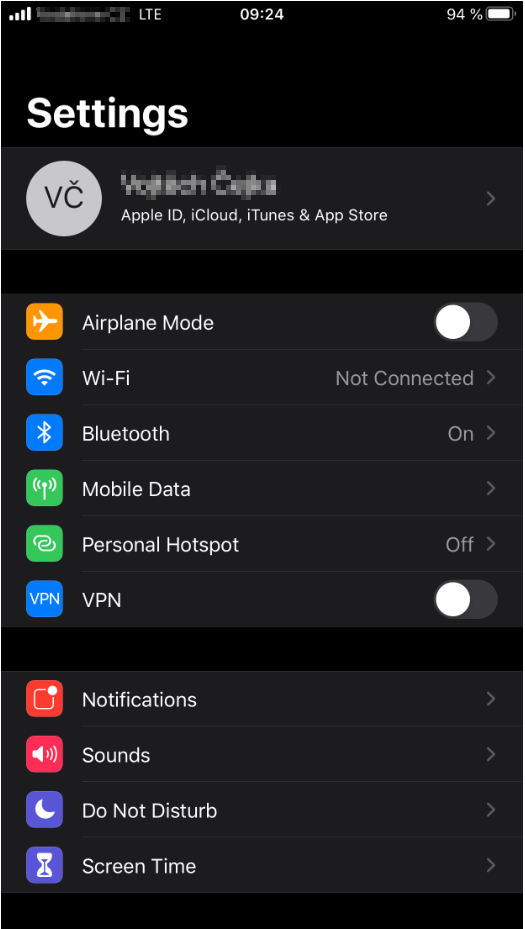
2) Find “Password and Accounts” in the Settings
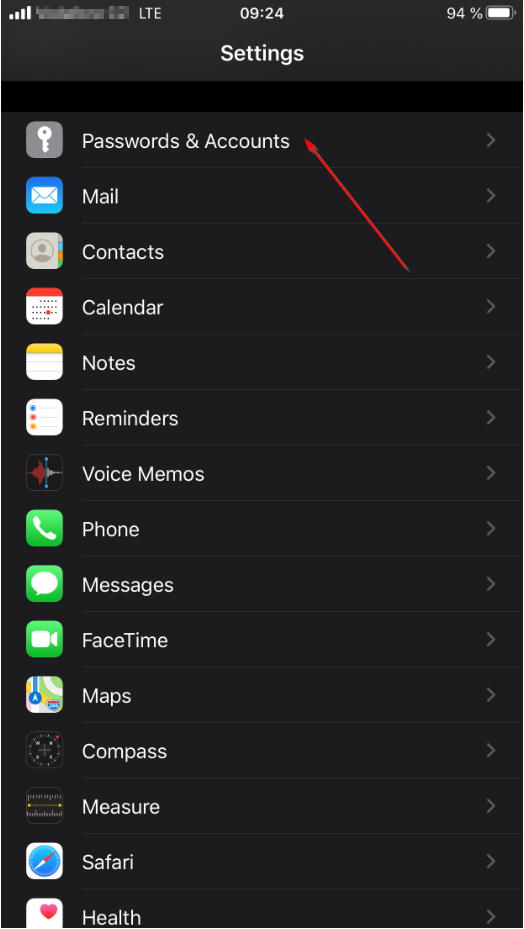
3) Click “Add Account”
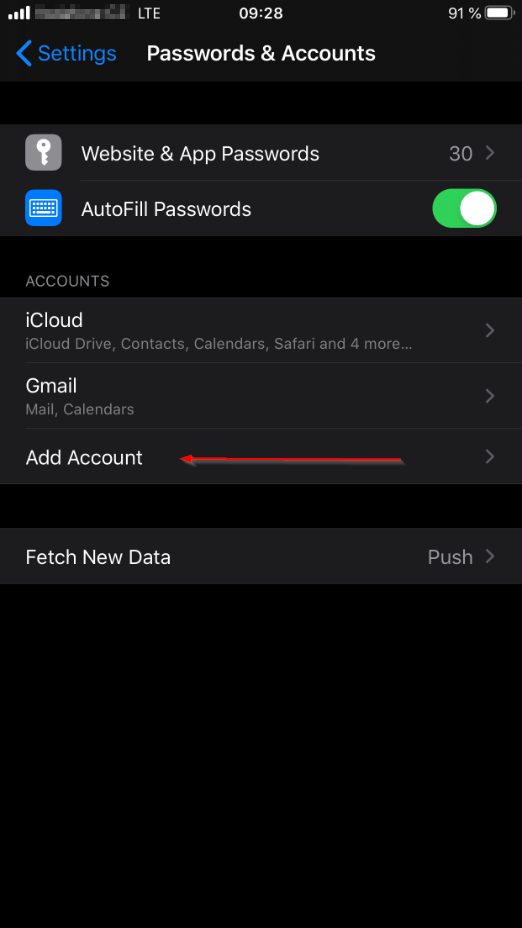
4) Select “Other” in the Add Account menu
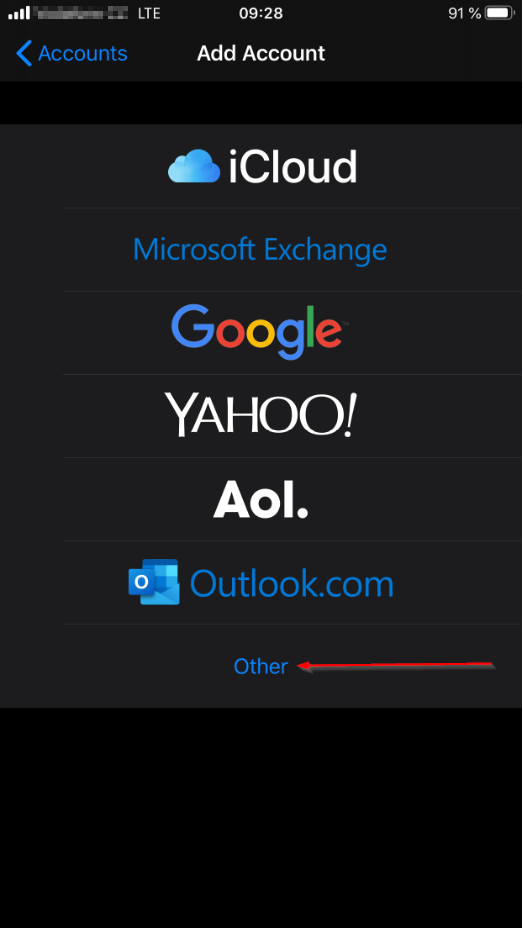
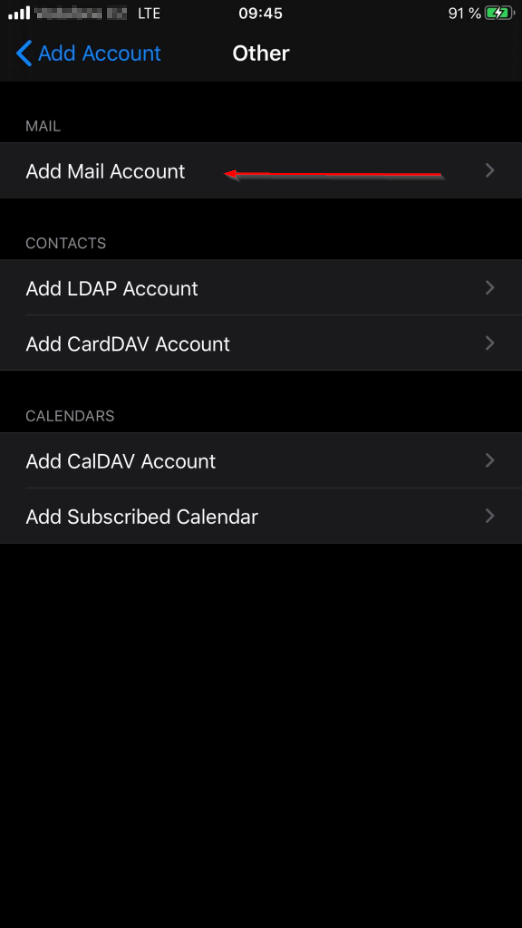
5) Select “Add Mail Account” in the “Other” menu.
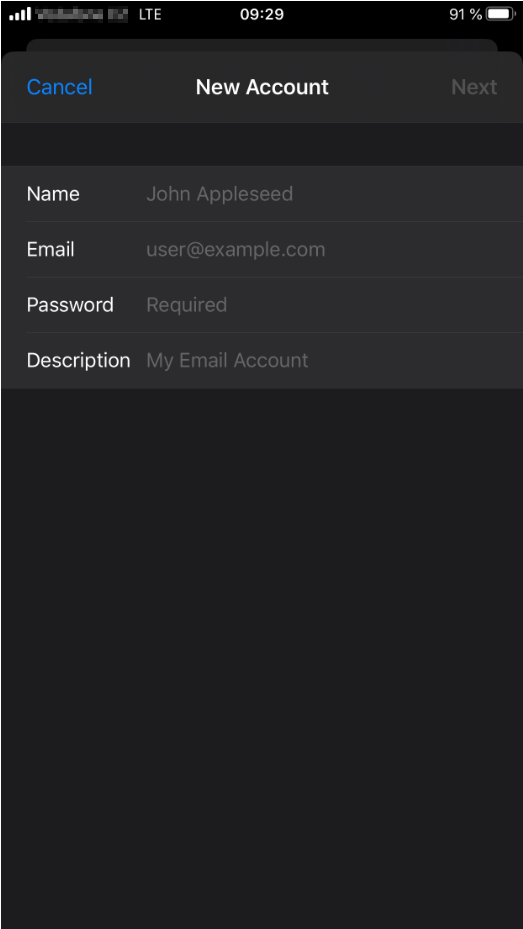
6) Fill required fields in “New Account” and press next.
Into the email row – fill your TimeMaker internal address.
The TimeMaker address can be found inside your TimeMaker.
Or you can follow the guide here.
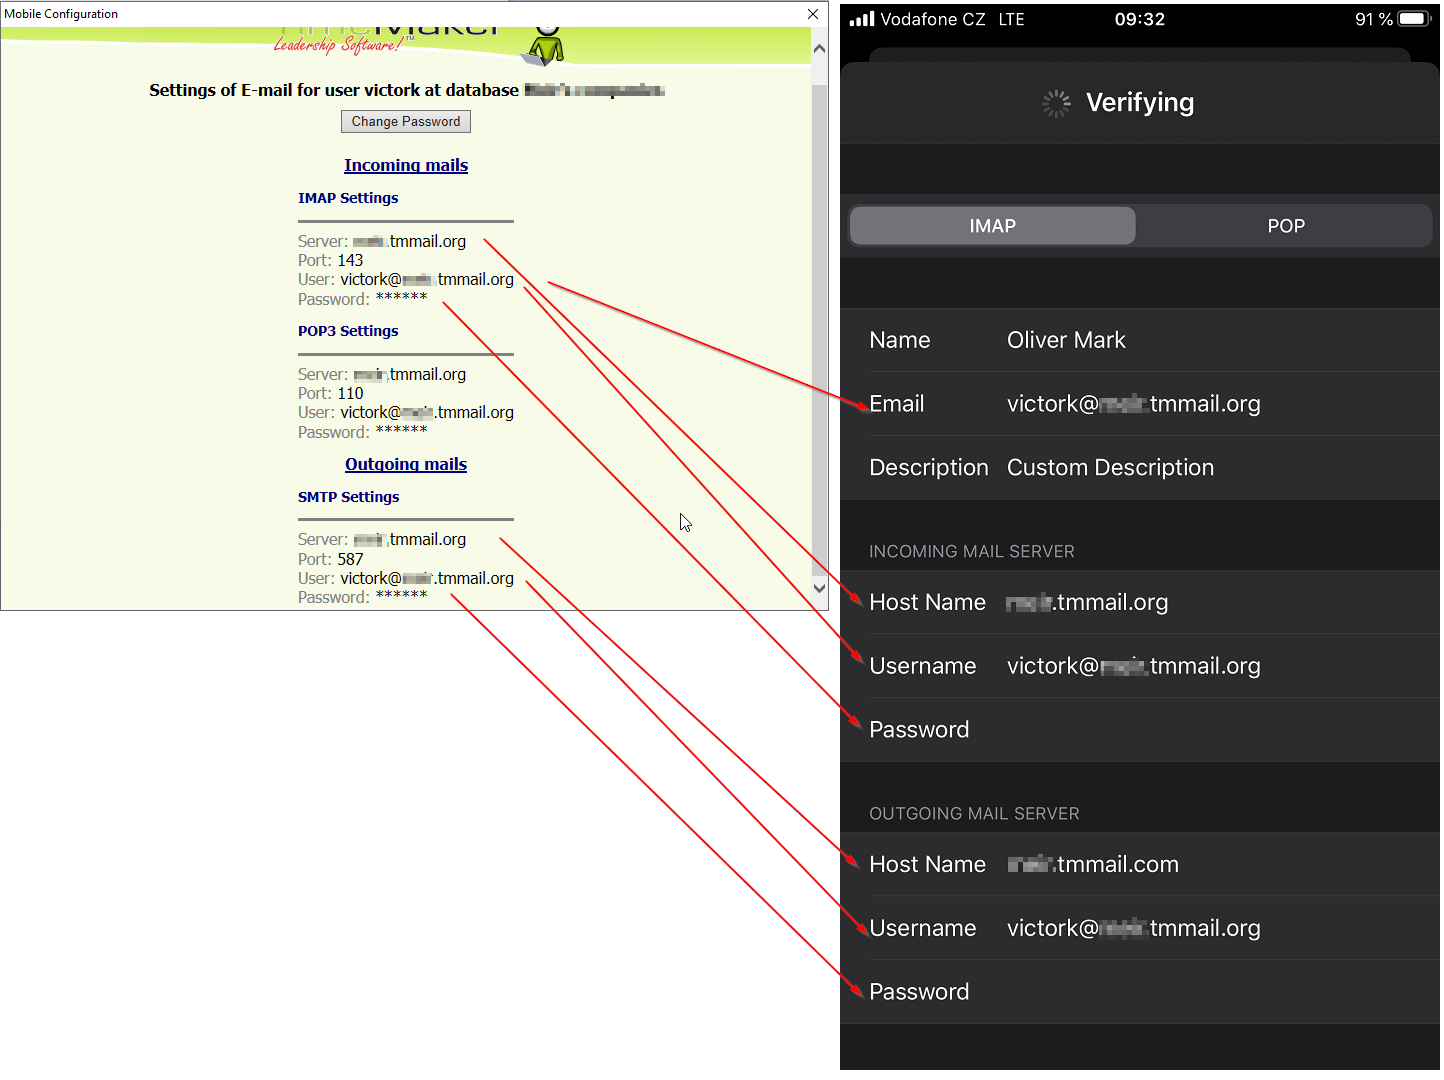
7) Fill in All reqired fields:
* Please note, Outgoing mail server is displayed as SMTP in your mobile synchronisation in your TimeMaker.
You can find all details about your account in the TimeMaker (Email –> Mobile Synchronisation) Also you can find the guide here.
** all data in the fields are EXAMPLE! Always use your account details.
8) If you are prompted for confirmation of usage of unsecured server, press yes. We dont support SSL at mobile connection.
9) Done – now you can use your Mail application.