Quick start guide
This section takes you through the basics of using the TimeMaker application.
Quick Help Chapters
- Installation
- Adding database and login
- Overview
- Create new message/e-mail
- Create, move, and complete production task
- Basic user administration
Overview
The following screenshot divides TimeMaker into eight sections. Each section represents a set of menus, buttons, and texts. Click the image to enlarge it.
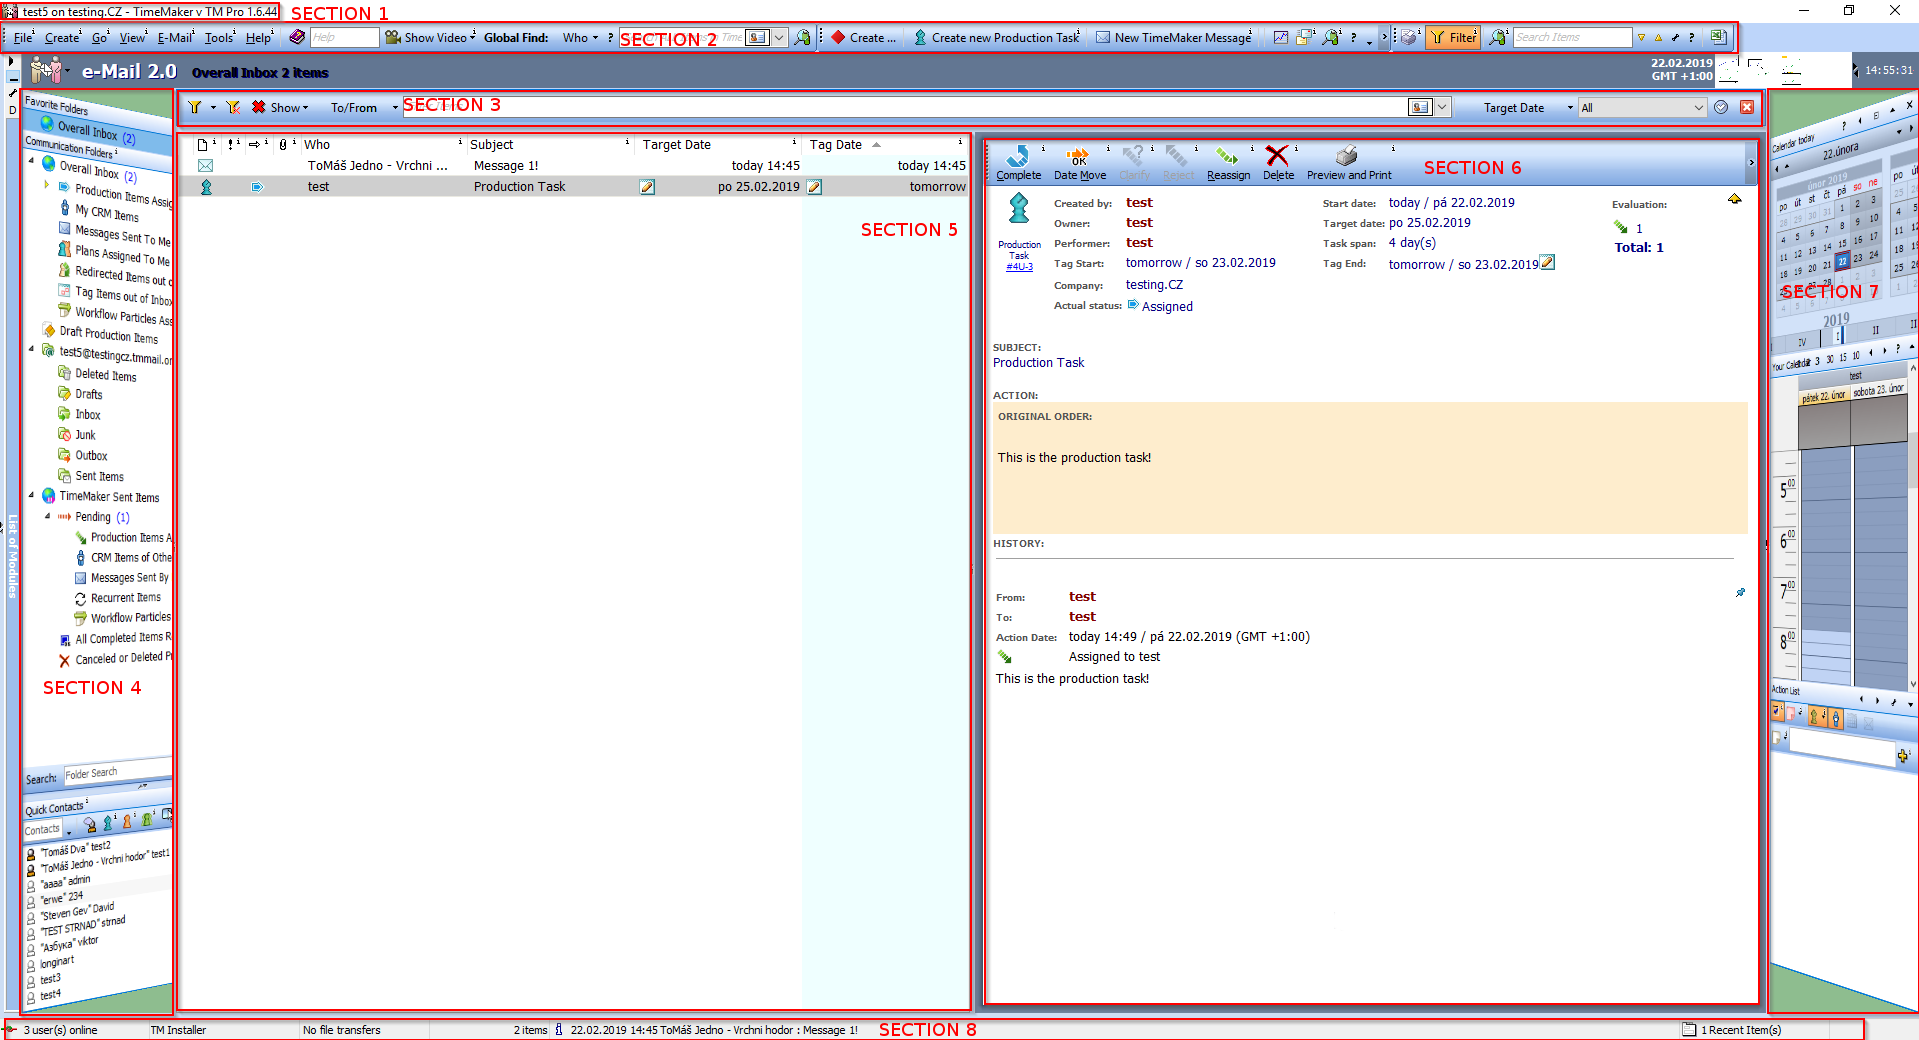
To learn more about an exact function, press the i button next to the function, button, or menu.