mail.com

1) Go to the mail.com and log-in

2) Click the “E-Mail Settings”

3) Click the “Filter Rules”

4) Click the “Forward e-mails to another e-mail account” and fill in desired TimeMaker email address. ( how to find my TiemMaker address is described here)
– note: This is premium function only by mail.com

iCloud.com


1) Go to the iCloud.com and sign in with your Apple ID.

2) Click “Mail”

3) In your “Mail” click the Settings button and select “Preferences..” as at the image:

4) In the “Preferences” check the box with “Forwarding” and fill in your TimeMaker e-mail address:

How to find TimeMaker email address is described here.

5) Press “Done” – when pressed all iCloud emails will be forwarded to desired email address. More infrmation can be found here. 

Mobile Setup – iOS

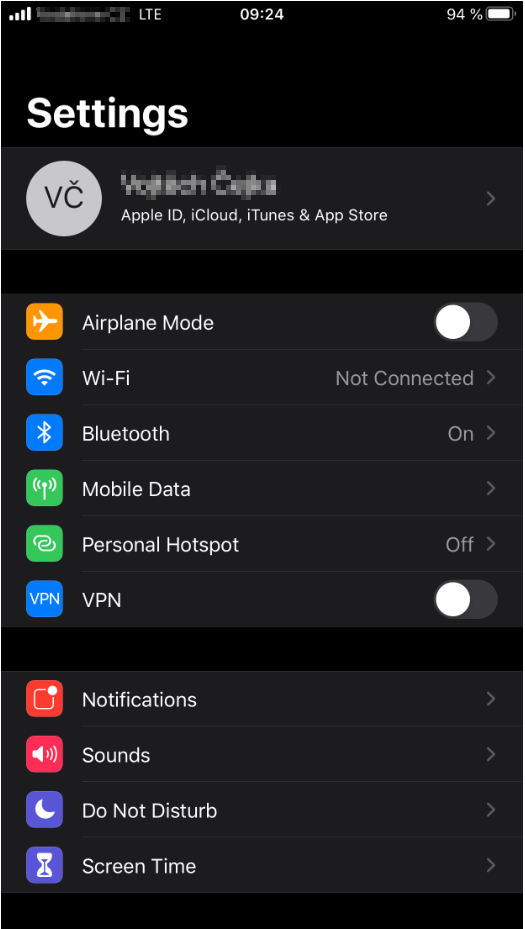
Follow the guide below to set up IMAP email  (Mail app) on an iOS device. (iOS 13+)

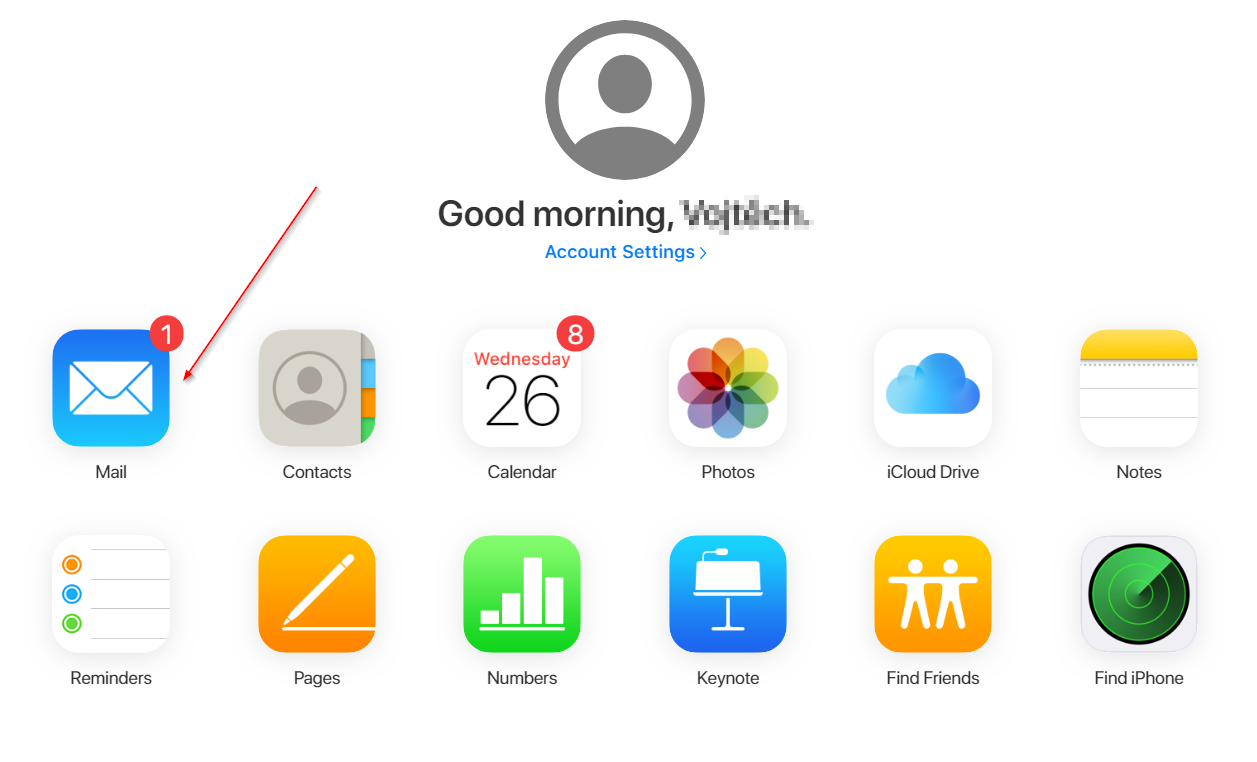
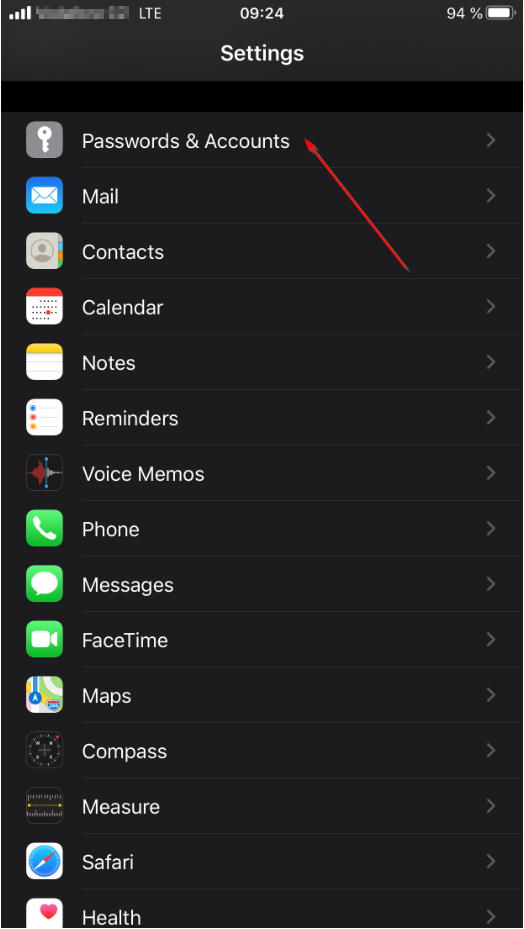
1) Open Settings in your iPhone

2) Find “Password and Accounts” in the Settings

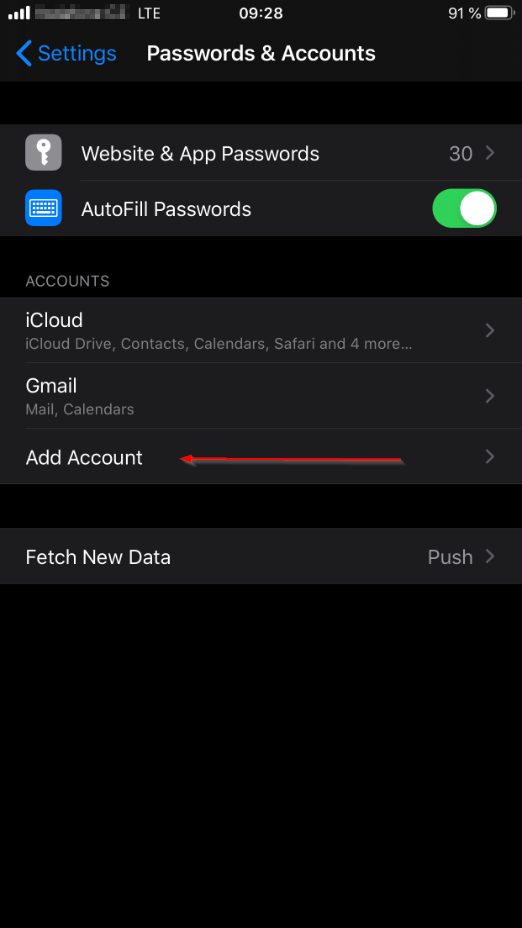
3) Click “Add Account”

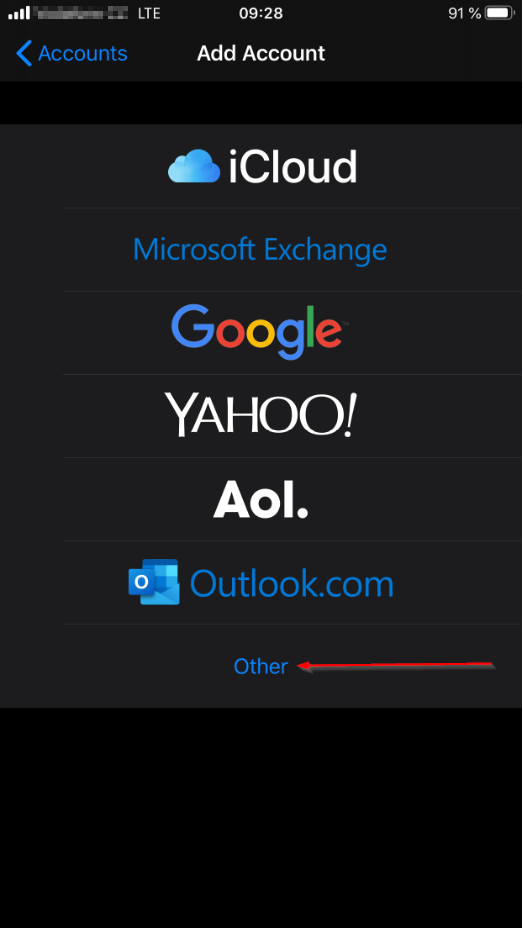
4) Select “Other” in the Add Account menu

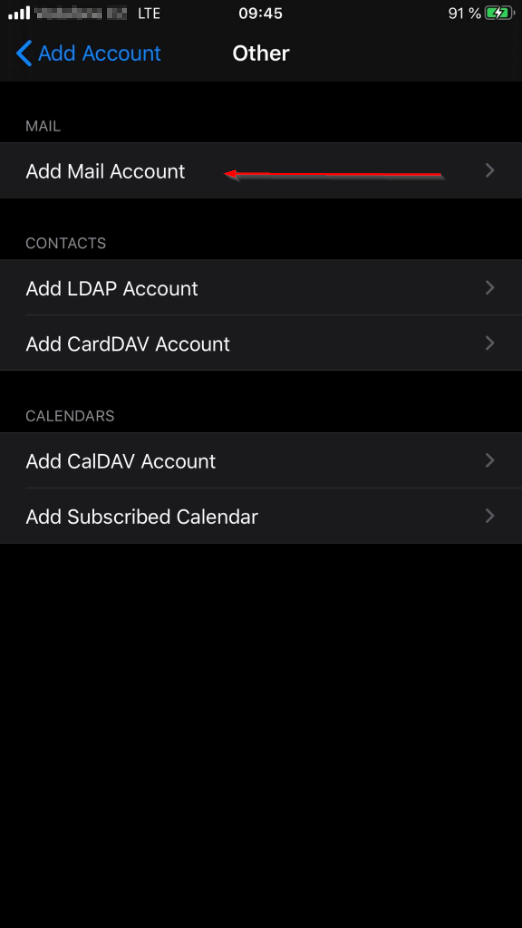
5) Select “Add Mail Account” in the “Other” menu.

6) Fill required fields in “New Account” and press next.
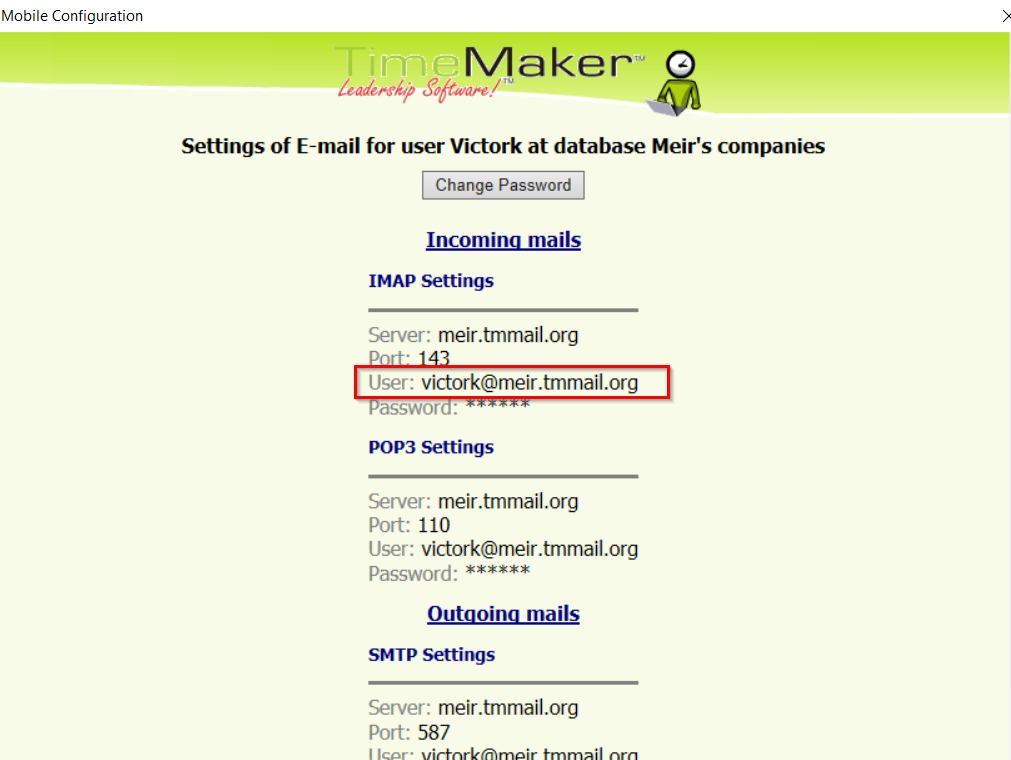
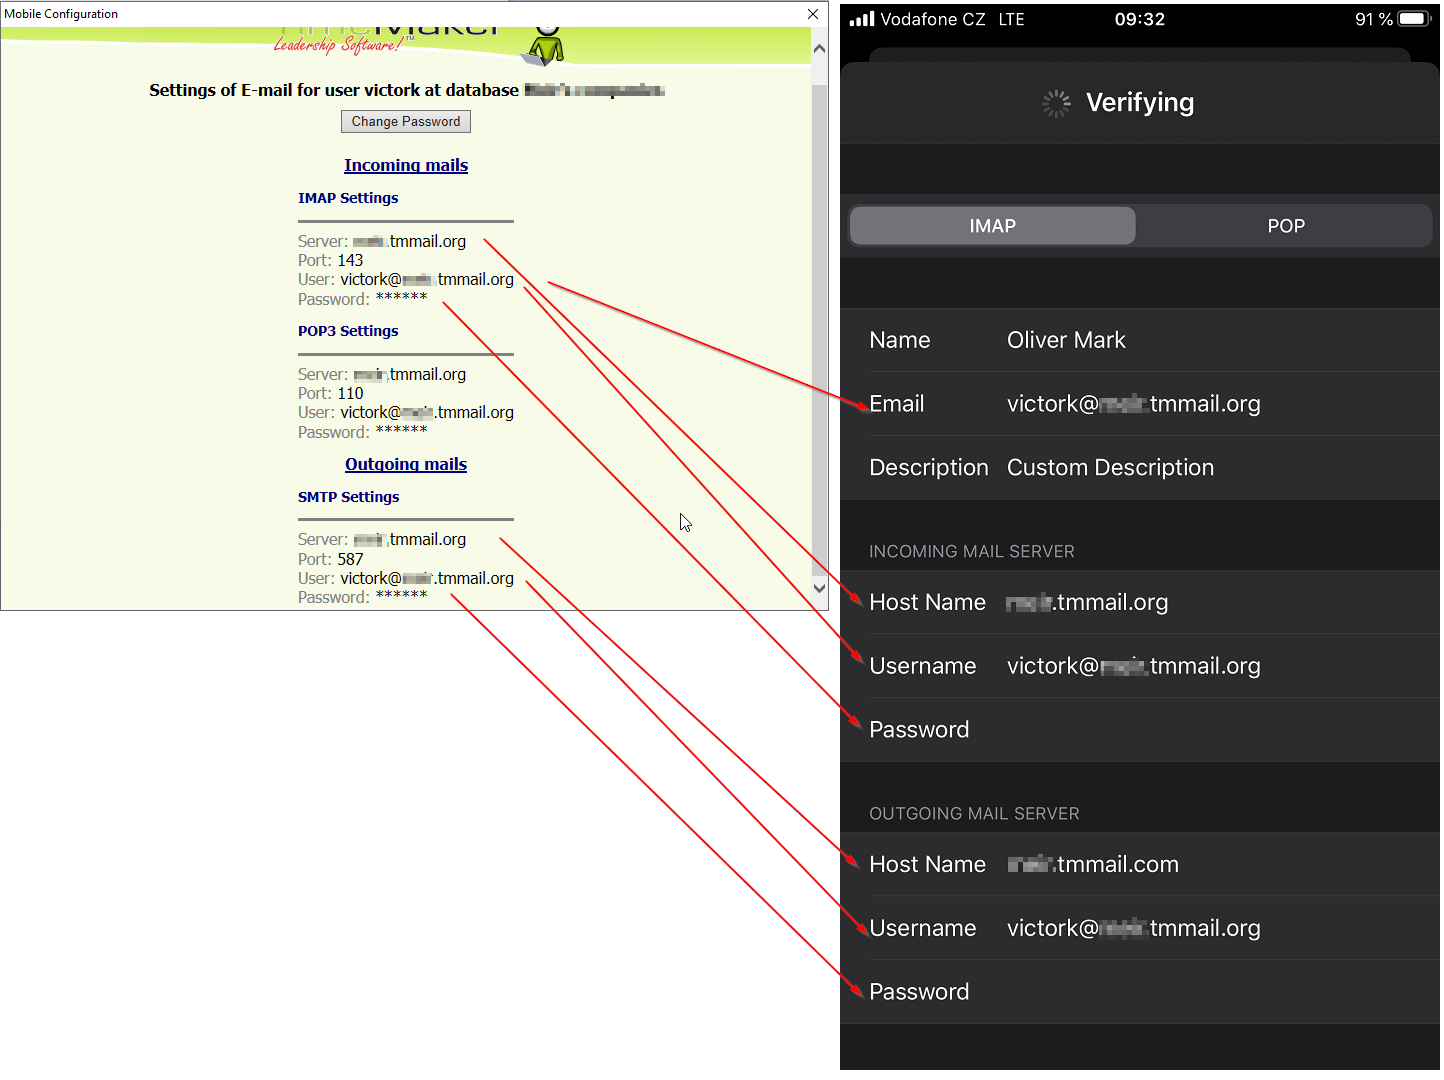
Into the email row – fill your TimeMaker internal address.
The TimeMaker address can be found inside your TimeMaker.
Or you can follow the guide here. 

7) Fill in All reqired fields:
* Please note, Outgoing mail server is displayed as SMTP in your mobile synchronisation in your TimeMaker.
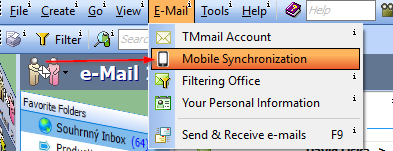
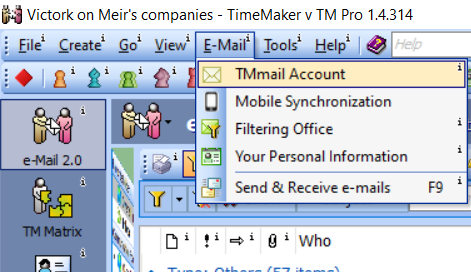
You can find all details about your account in the TimeMaker (Email –> Mobile Synchronisation) Also you can find the guide here. 

** all data in the fields are EXAMPLE!  Always use your account details.

8) If you are prompted for confirmation of usage of unsecured server, press yes. We dont support SSL at mobile connection.

9) Done – now you can use your Mail application.

Calendar synchronization – Google

Hello,

In this tutorial, we will guide you, how to connect and synchronize your timemaker calendar to your Google calendar. You will be able to manage your calendar from your phone or any device with google calendar connection.

1) Open TM calendar module

2) Right click on your calendar name and select properties

3) Move to Calendar Synchronization Tab


4)
click on “get Gmail Authorization ID” and procede with instructions you will see on screen

Email configuration guide

How to set-up your Email
If you want to use TimeMaker with already existing non-TimeMaker e-mail account, it is necessary to do a few steps.

Setup of the non-TimeMaker e-mail account you need prepare at the side of your e-mail provider.  You don´t have to give us your password of your e-mail (We don’t even want to know your password).

For the receieving emails we use the Forwarding.
For sending we use an Association.

1. Forwarding
You have to set-up forwarding to your TimeMaker e-mail address. How to find your TimeMaker e-mail addres is described here.
Forwarding can be set-up at website of your e-mail provider.
For the set-up, please choose your e-mail provider from the list below:
Gmail.com
Yahoo.com
Outlook.com
iCloud.com
mail.com
yandex.com
zoho.com 
fastmail.com 
seznam.cz
centrum.cz 

If your provider is not listed, contact our customer support.

2. Association
Association is form of connection enabling user to use custom non-TimeMaker email address within the TimeMaker.
For set-up please follow instructions described in chapter Email Association

How to add your TimeMaker e-mail address in your cellphone:
Android
iOS


Email association

For your non-timemaker email to be able send emails from Timemaker software you have to make email association.

For that go to:

1. Files -> Email -> TMmail Account

2. Click on Add another email address.

3.  Fill your existing email address here and click on next.

Go to webpage of your exisiting e-mail address. Open e-mail delivered from Timemaker and click on link inside of that email. Now is association complete.