1) Open your Gmail account
2) Go to Gmail settings
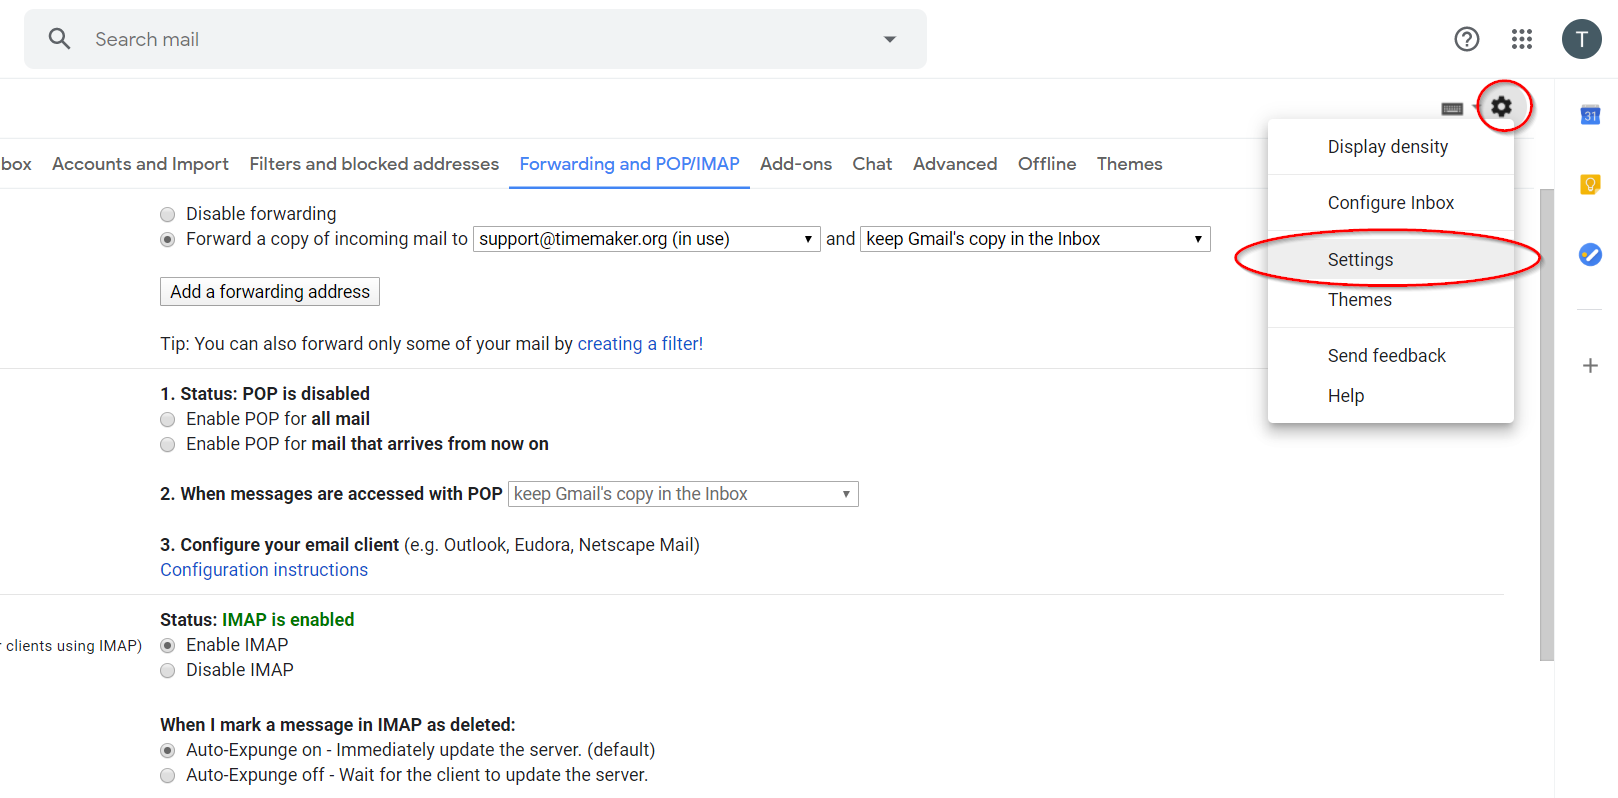
3) Click on “Add a forwarding address”
4) Additional window opens and google will be guiding you through whole process
5) for more information, please go to google support. LINK
1) Open your Gmail account
2) Go to Gmail settings
3) Click on “Add a forwarding address”
4) Additional window opens and google will be guiding you through whole process
5) for more information, please go to google support. LINK
This is the guide for the MS Office Plugin to send files into the TimeMaker (manual installation)
This installation is divided to two parts. First is download/installation/registration of required files. Second is installation and integration in OFFICE and TimeMaker interface. Both parts must be sucesfully done to completely install the MS Office Plugin.
Minimal version of the TimeMaker to run this plugin must be 1.6.96 and newer!
Part one – download/installation/registration of required files.
1) Download required files from here: www.timemaker.org/files/tools/dlls.zip
2) In the downloaded dlls.zip you can find two folders.
Folder 32 and 64.

3) Now determine if you have 32/64bit version of the MS Office!
How to do it:
– Start a Microsoft Office program (Word, Excel).
– Click the File tab in the ribbon.
– Then click Account
– On the right, you should see an About button. In this example, we see About Word
The follow screen will present you with what Office version you are running.
4) When you know your version of MS Office (32bit or 64bit) – extract folder 64 or 32 inside the downloaded .zip to the:

(!The path may vary depending on your TimeMaker installation path! – always put extracted folders into /dlls folder in your TimeMaker installation directory )
5) !OPTIONAL STEP FOR CUSTOM TM INSTALLATION FOLDER! if you have TimeMaker in default installation path you can skip to part 6)
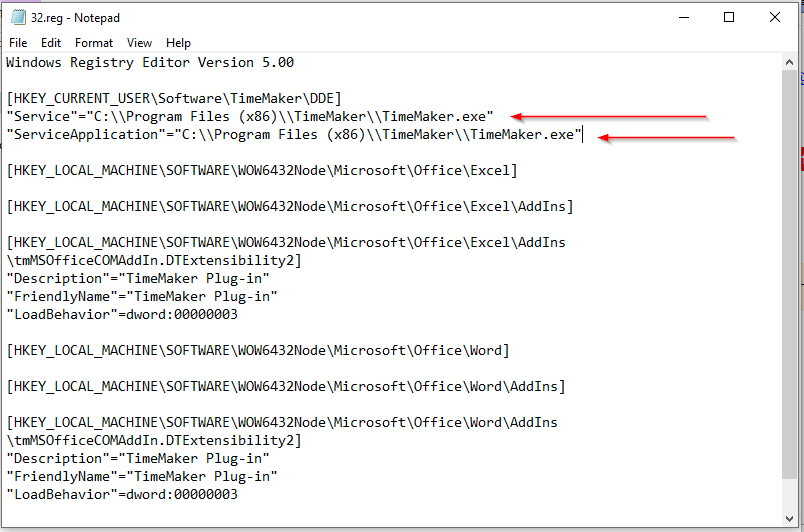
– In this case its needed to edit “reg.bat and 32.reg or 64.reg” file in the /32 or /64 folder. (depending your office version)
– Right click the “32.reg or 64.reg” file end select edit
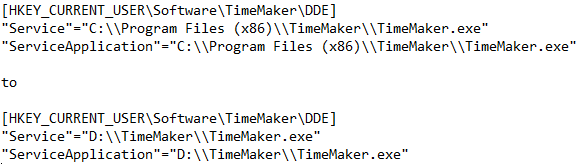
– Edit the rows in the registry key according to your TimeMaker installation folder:
For example from:
– Save and close.
– Right click the reg.bat file and select edit.
– Edit the first line of your reg.bat file to your custom TimeMaker installation path, for example:

– save the reg.bat
6) Run the reg.bat in the /32 or in the /64 as the administrator!
(right click reg.bat and select run as administrator)
– confirm popping windows.
– the windows will inform you that registration of the .dll was successful and confirm adding of registry entry.
7) Done, now you can follow part two.
Part two – integration in MS Office interface.
1) Open the MS Office aplication (Word/Excel) and navigate to:
File –> Options –> Add-ins
The TimeMaker Plug-in should be visible in the list of Inactive Application Add-ins
2) Select from dropdown menu “COM Add-Ins” as at the screenshot and click Go..
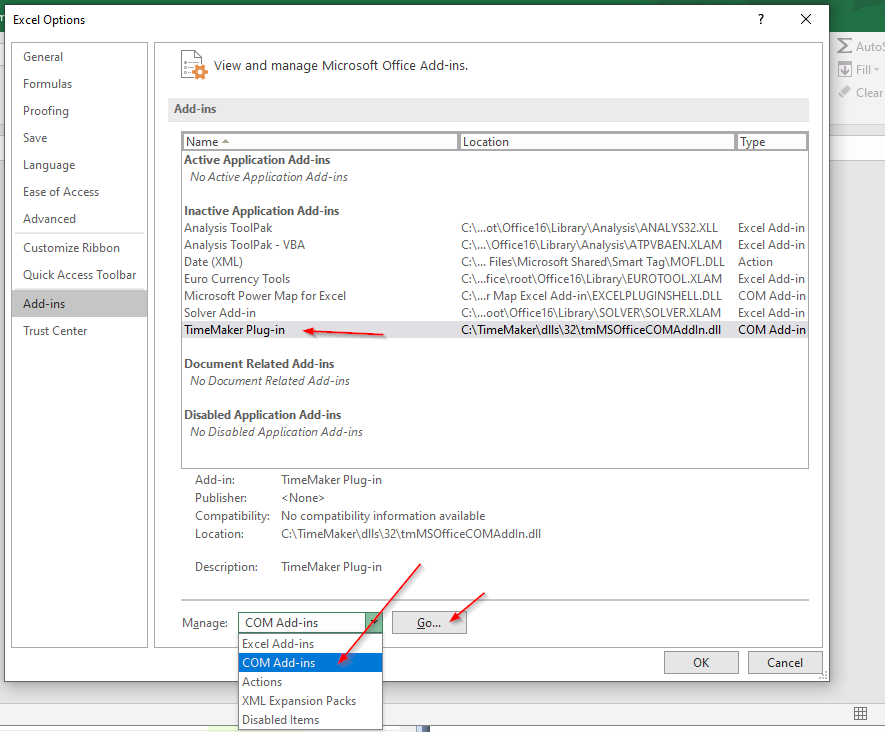
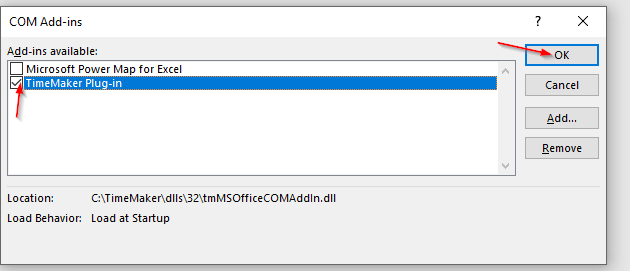
3) Check the box with TimeMaker Plug-in as at the screenshot and click OK
4) Now when plug-in is activated you can use the function to send files into the TimeMaker Message or to the TimeMaker production task.
When you want to send the file into the TimeMaker go to the tab Add-Ins (as at the screenshot)
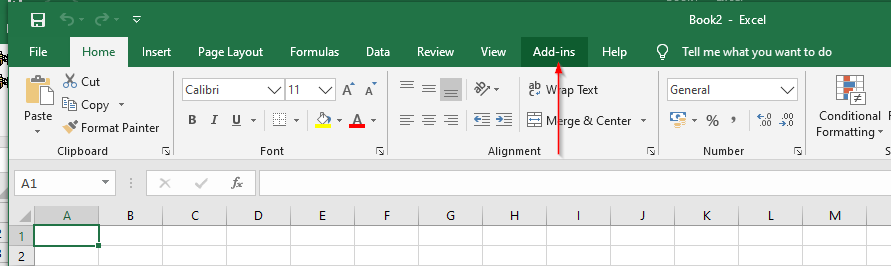
and select desired action:

This is guide for the MS Office Plugin to send files into the TimeMaker (auto instalation)
1) Open the TimeMaker application.
2) Open TM Installer and install MS Office Add-in ( bottom left corner)
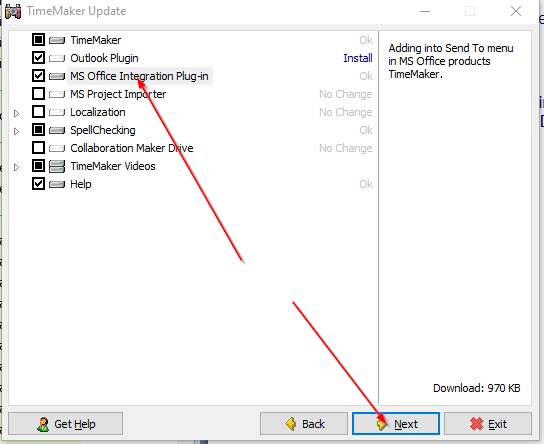
3) Install MS OFfice Integration Plug-In (check the box and click next and download)
4) Open the MS Office aplication (Word/Excel) and navigate to:
File –> Options –> Add-ins
The TimeMaker Plug-in should be visible in the list of Inactive Application Add-ins
5) Select from dropdown menu “COM Add-Ins” as at the screenshot and click Go..
6) Check the box with TimeMaker Plug-in as at the screenshot and click OK
7) Now when plug-in is activated you can use the function to send files into the TimeMaker Message or to the TimeMaker production task.
When you want to send the file into the TimeMaker go to the tab Add-Ins (as at the screenshot)
and select desired action:

What is it?
A tool that enables you to close the window of the Production Task.
What happens if clicked?
The window of the Production Task is closed.

A tool that enables the owner to do next crm action
 Creates new production task for yourself. Without necessary to create the new production task.
What happens if clicked?
What is it?
A way to print a list of what you see on the screen.
Note The E-Mail 2.0 Module has different look when you use TM with Microsoft Outlook support.
What happens if clicked?
The Print Preview window appears displaying the list of items as presented on the screen and from that Preview you can choose to print etc.
Note: The E-Mail 2.0 Module has different look when you use TM with Microsoft Outlook support.
Description
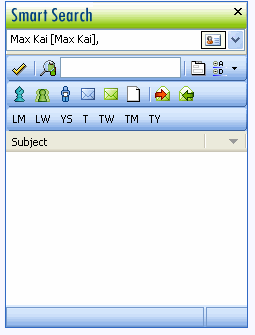
The TimeMaker Smart Search is a unique and powerful tool allowing the User, based on User Rights, to search for any Contact and see all communications with that Contact. With full User Rights, the User will see not only the communications the User had with the Contact, but all communications between any person in the organization and that Contact, and all the attachments for each communication. The SS presents the communications in an organized manner so you can request the communications per Subject for example, allowing you to view a thread of communications. You can request presentation of the data in various manners and execute keyword searches on the selection.
You can access the SS from anywhere in TimeMaker by pressing F3.
It is a VERY powerful tool.
What happen if clicked?
The TimeMaker Smart Search window will open allowing you to execute a search.
![]()
A tool to control what will be presented at the List of Items Window in the E-mail 2.0 module.
Utilizing the Filter you can define the items that will be presented based on:
The Filter toolbar appears where you will be able to setup the filtering rules, save the Filter settings and apply the various filtering rules.

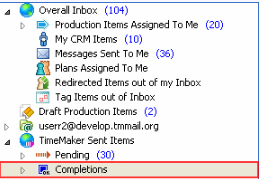
An option used to file completed TimeMaker Messages in the Completions Folder. By clicking the Close Communication button, the TimeMaker Message is moved to the Completions Folder