
What is it?
Using this menu command you can create a new Production Task.
What happens if clicked?
Enter the text for the new Production task Item in the Add box

and click  or press Enter.
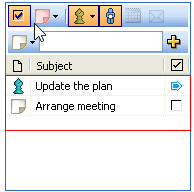

What is it?
Using this menu command you can create a new Production Task.
What happens if clicked?
Enter the text for the new Production task Item in the Add box

and click  or press Enter.


What is it?
Using this menu command you can create a new Action List Item.
What happens if clicked?
Enter the text for the new Action List Item in the Add box

and click  or press Enter.

The following window is the Login Window.
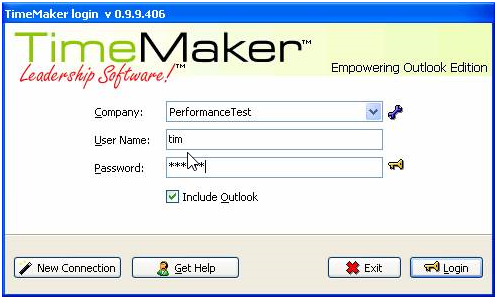
 Offline Authorization
The password you entered is first authorized locally and then authorized on the server. If the administrator has changed your password, you will be asked to enter the previous password first and then the new password.
Click the icon to change the mode.
 Online Authorization
The password you entered is authorized on the server. You must be online to login in this mode. This function is useful if you forget your password or if the adminstrator has changed it. Click the icon to change the mode.
 Resynchronize data
Data will be fully downloaded from the server. To login to TimeMaker in this mode you must be online. This is usefull when data is incorrect and you want to be sure that you have all the data correct. Click the icon to change the mode.
 This icon displays a window to configure the connection.
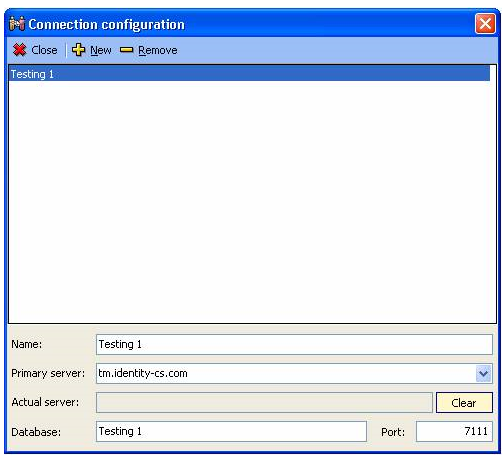
Close – click to close the window
New – click to clear all fields to enter the new configuration
Remove – click to remove selected configuration
Name – displays the name of the company
Primary server – displays the primary server address
Actual server – dispays the actual server address
Database – displays the database name
Port – displays the port number
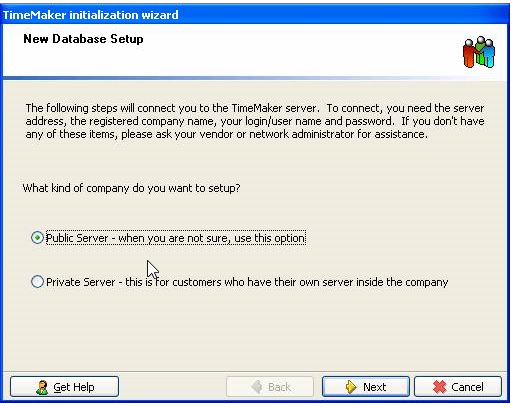
At the first start-up, the “New Database Setup” Dialog Box appears. TimeMaker allows you to keep multiple server connections to different databases. To setup the next new connection click on “New Connection” in the Login window.
Select Public or Private Server, Click “Next”.
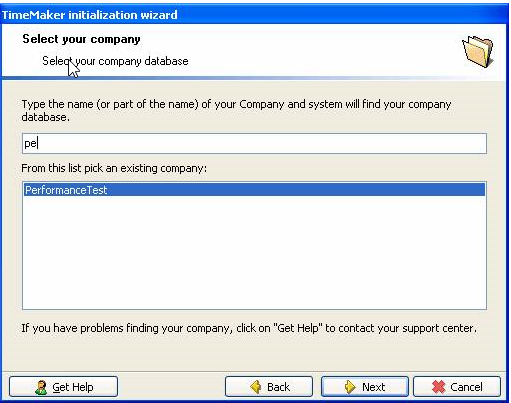
Type part of the name of your company to search and select a company database, click “Next”.
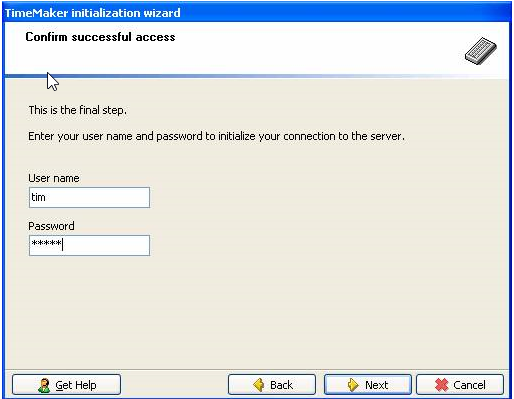
Enter your User Name and Password, click “Next” to proceed.
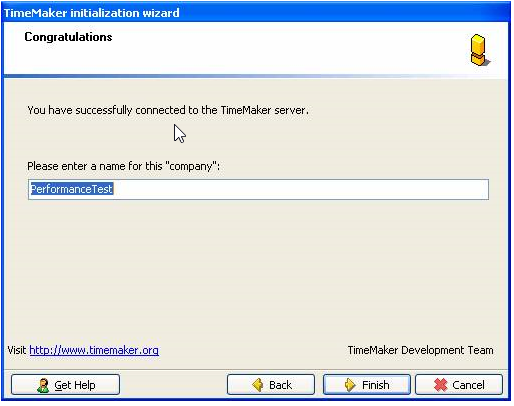
Type any name for this connection configuration, then click “Finish” to save it.
To install TimeMaker on your computer, follow these steps.
1. Go to www.timemaker.org
2. Download the latest version of TimeMaker Installer
3. Execute TimeMaker Installer setup to install TimeMaker
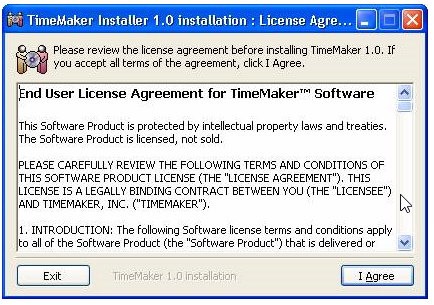
When you execute downloaded file following window appears. Click “I Agree” to accept the terms of License Agreement.
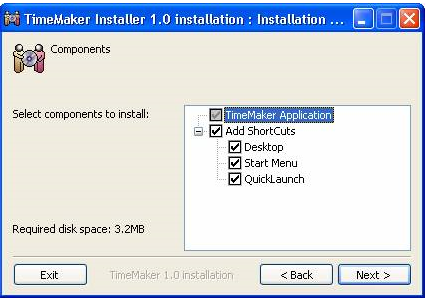
Select components to install and click “Next”.
Choose TimeMaker directory – default is “C:Program FilesTimeMaker”. Click on “Browse” to select a different location. When finished, click “Install” to proceed.
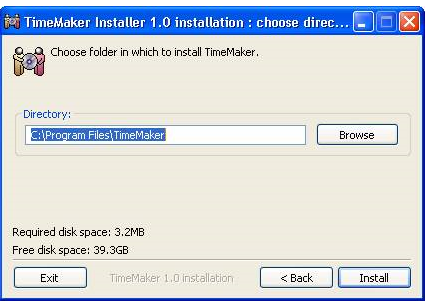
TimeMaker will create the directory and install the program files.
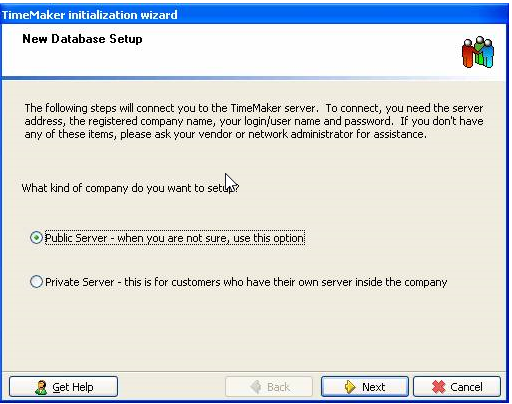
At the first start-up, the “New Database Setup” Dialog Box appears.
Select Public or Private Server, Click “Next”.
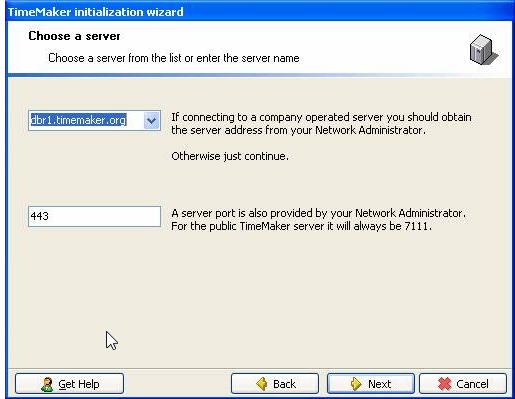
Select the server address and server port, or insert it manually, then click “Next”.
(this dialog may be hidden, but you can access it from the next one by clik “Back”)
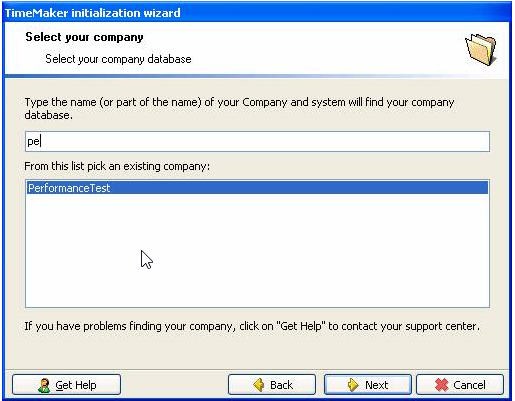
Type part of the name of your company to search and select a company database, click “Next”.
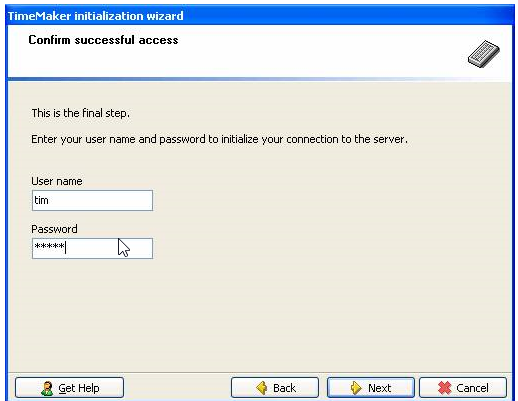
Enter your User Name and Password, click “Next” to proceed.
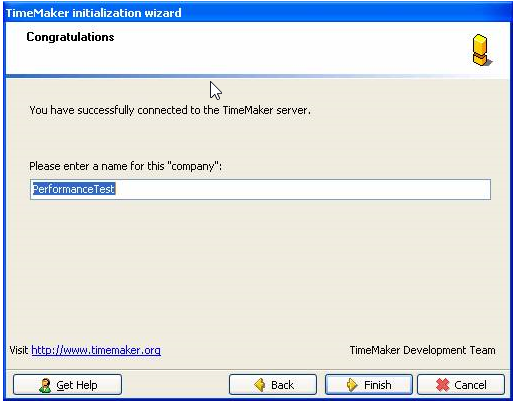
Type any name for this connection configuration, then click “Finish” to save it.
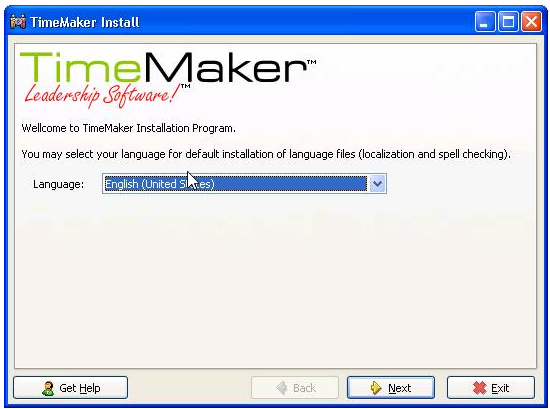
Select your language for default installation of language files.
Select the missing parts of Localization and Spellchecking to install (check the desired languages). Click “Next”.
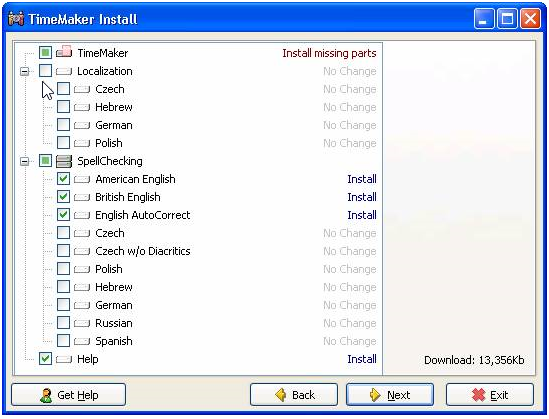
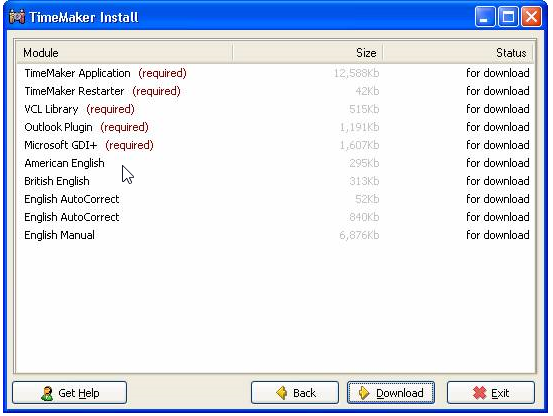
Next screen displays all files to download. Click “Download”.
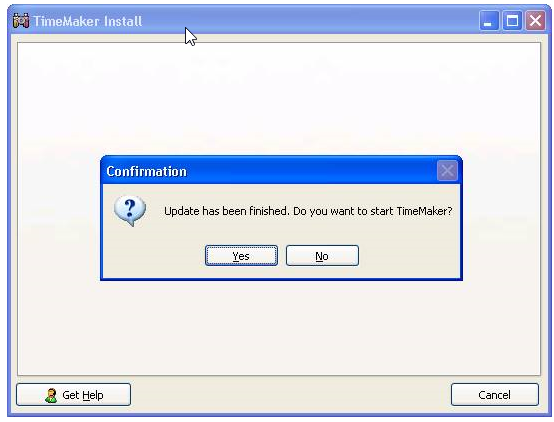
After all updates are installed click “Yes” to start TimeMaker. Please see Login window
Each function of TimeMaker’s business management components can be accessed by user-defined shortcuts.
TimeMaker is equipped with an easy to define, easy to follow color system enabling a quick assessment of the status of any communication, production item or target. For example, an item that is completed on time might be blue, an item overdue might be red, an item completed but past the target date might be brown, etc. All system colors are user defined by either the individual user or by the system administrator.
All TimeMaker components are equipped with a powerful and user friendly global search capability, “TimeMaker Search”, enabling fast comprehensive searches of the TimeMaker databases.
Most executives agree that meetings are often a waste of time, consisting usually of general discussions and the assignment of tasks that are hard to track, get lost in the shuffle, or become overdue. Such meetings typically don’t result in the desired product. Using TimeMaker’s meeting component solves this problem by ensuring proper assignment and tracking mechanisms for all tasks discussed or assigned during the meeting.
TimeMaker’s meeting management system includes all standard features used to invite participants, confirm participation, set and issue meeting agendas, and more It’s more unique features allow the immediate issuance of tasks directly from the meeting notes and a link system, linking current meetings to the records of all past meetings on the same subject, enabling a running record for each item of discussion and a quick and easy view of the status of all previously issued related tasks.
Every executive understands that the implementation of an idea requires proper planning. Proper planning requires a stated goal and clearly stated actions that need to be taken to achieve that goal.
TimeMaker’s planning component provides six user-defined planning levels suitable for creation of an entire plan – from broadly stated strategies to a series of targets, to individually assigned Production Tasks – all of which need to be accomplished to turn any idea into reality. These planning levels range from general concepts to specific tasks needed to achieve the final product desired. This then allows execution of the plan to begin with the specific tasks, working upwards to and including complete achievement of the broadly stated ideas.
Planning Level 1 might be a strategy consisting of broadly stated targets, such as:
Target 1: We want to price our product to be competitive with our top 30 competitors.
Target 2: We will sell our product in vertical markets.
Target 3: We will provide better service than our customers expect.
Target 4: We will constantly enhance our products and service.
Planning Level 2 might be a tactical planning level, consisting of the steps needed to achieve the broad targets in Planning Level 1, stated in a more specific manner, such as:
Target 1: We want to price our product to be competitive with our top 30 competitors.
Tactical Step 1: We will survey the prices of our top 30 competitors.
Tactical Step 2: We will survey the market as to their opinion of those
prices.
Tactical Step 3: We will establish our prices based on steps 1 and 2 above.
A Planning Level 2 Tactical Step can be written for each target identified in Planning level 1.
Planning Level 3 might then consist of operational planning and include each action needed to accomplish the Tactical Steps of Planning Level 2, for example:
Target 1: We want to price our product to be competitive with our top 30 competitors.
Tactical Step 1: We will survey the prices of our top 30 competitors.
Operational Action 1: We will create a database for the competitor pricing data collected.
Operational Action 2: We will hire a team of 10 hourly employees to research our competitors’ retail pricing at the top supermarkets in the area.
Operational Action 3: We will hire a company that specializes in marketing intelligence to investigate our competitors’ wholesale pricing.
TimeMaker’s planning component allows planning for up to six different user defined levels as needed, with each production item for each level specifying the person responsible for completion of the item, the start date, target date for completion and other relevant data. And unlike MS Project® and other project management tools, the TimeMaker allows the issuance of relevant orders from the plan that will then be automatically tracked for compliance at each level.